on
Dinner Ideas
- Get link
- X
- Other Apps
Freezing bananas is a simple and smart way to keep them fresh for later use, and it opens the door to a variety of tasty recipes down the line. From smoothies to baked goods, this guide will show you how to freeze bananas properly and turn those frozen goodies into seven delicious treats that anyone can whip up. Let's make the most of those overripe bananas!

Banana bread is a timeless favorite, especially when you have frozen bananas on hand. The image shows a beautifully baked loaf of banana bread, sliced to reveal its moist interior. Next to it, you can see fresh bananas, hinting at the key ingredient. This classic recipe is perfect for using up those overripe bananas you’ve frozen.
Using frozen bananas is a great way to add natural sweetness and moisture to your bread. When thawed, they become soft and easy to mash, making them ideal for baking. Plus, it’s a fantastic way to reduce food waste!
Let’s get into the ingredients and steps to make this delicious banana bread.
This banana bread is soft, flavorful, and perfect for breakfast or a snack. Enjoy it plain or with a spread of butter!
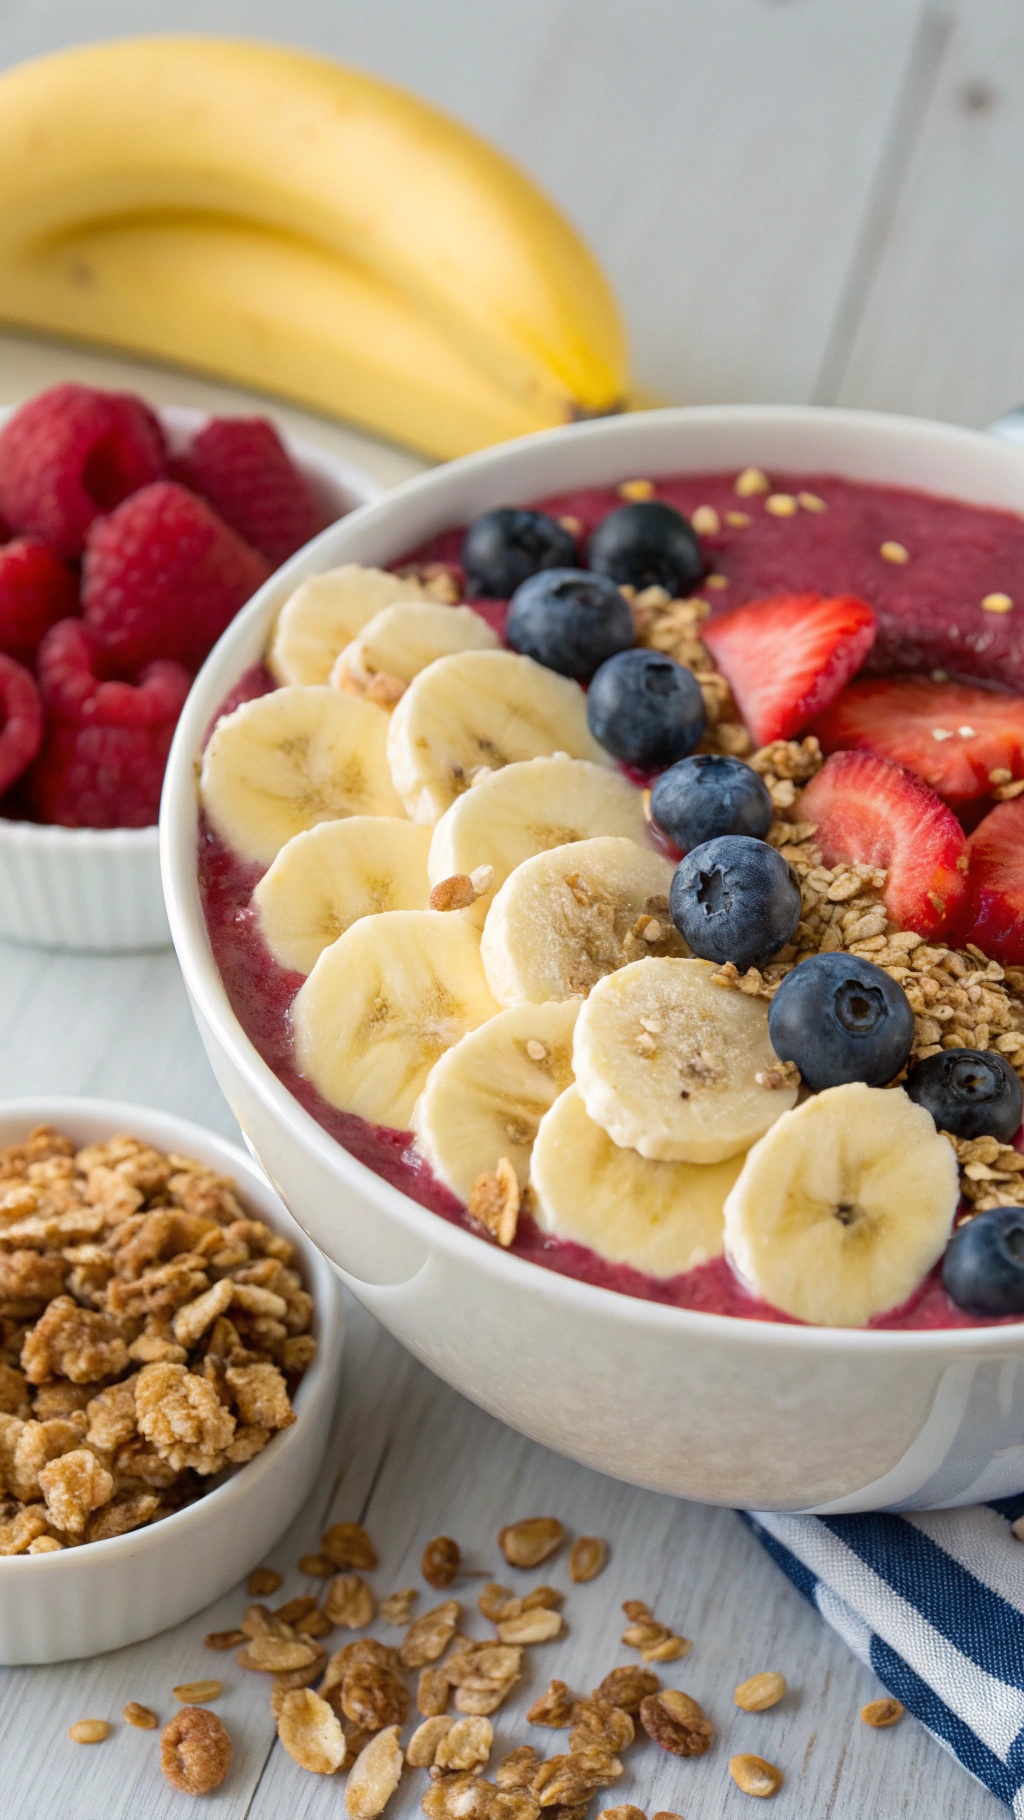
Frozen bananas are a game-changer for smoothies. They add a creamy texture and natural sweetness without the need for ice cream or added sugars. When you freeze ripe bananas, they become soft and blend beautifully, making your smoothies thick and satisfying.
In the image, you can see a delicious smoothie bowl topped with banana slices, fresh berries, and crunchy granola. This colorful presentation not only looks appealing but also packs a nutritious punch. The bananas serve as a base, while the berries add flavor and antioxidants. The granola on top gives a nice crunch, making each bite enjoyable.
To make a smoothie with frozen bananas, simply blend them with your choice of milk or yogurt, and add any other fruits or greens you like. You can experiment with flavors by adding peanut butter, cocoa powder, or even spinach for a nutrient boost.
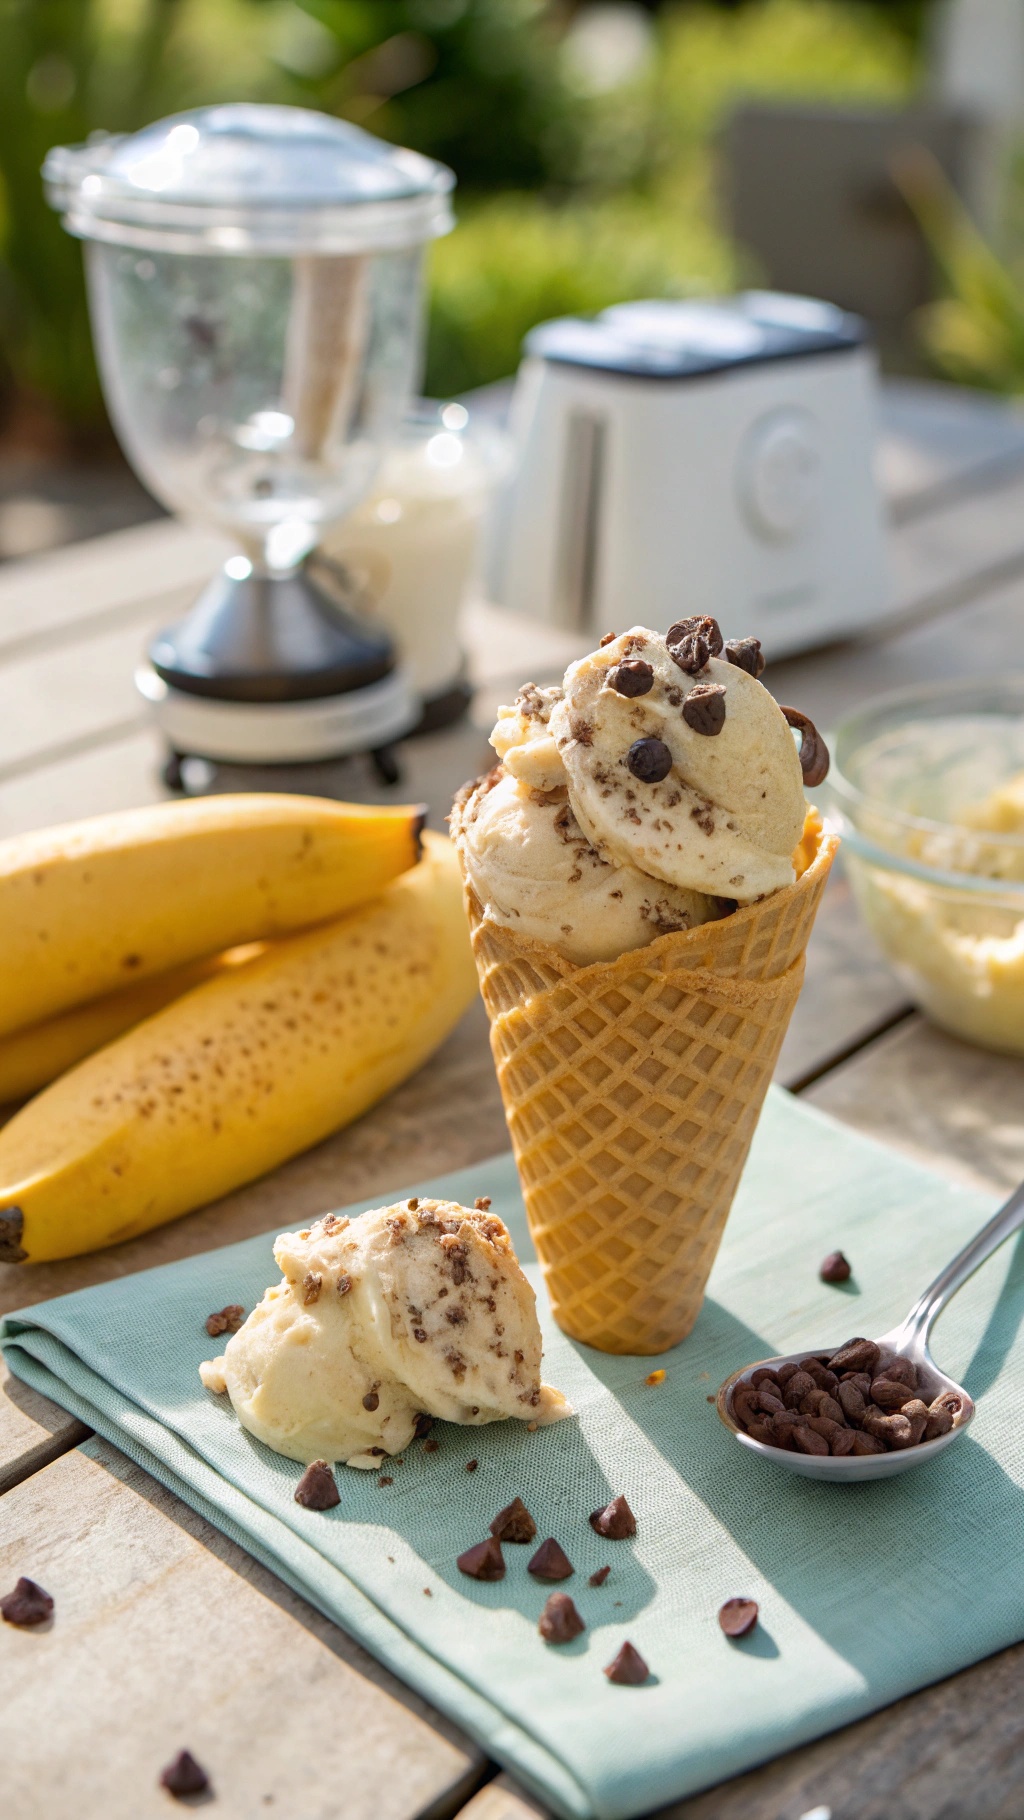
Banana ice cream is a fantastic way to enjoy a creamy dessert without any dairy. This treat is not only delicious but also simple to make, especially when you have frozen bananas on hand. The image shows a delightful cone filled with smooth banana ice cream, topped with chocolate chips. Nearby, you can see fresh bananas and a few chocolate chips scattered around, hinting at the rich flavors to come.
To make this indulgent banana ice cream, all you need are ripe bananas, a splash of vanilla extract, and your choice of mix-ins like chocolate chips or nuts. The process is straightforward: blend the frozen bananas until creamy, add your flavorings, and enjoy!

Banana pancakes are a delightful way to start your day. They’re fluffy, sweet, and packed with flavor. Using frozen bananas makes this recipe super simple and convenient. Just grab those bananas from your freezer, and you’re ready to whip up a delicious breakfast!
In the image, you can see a stack of golden pancakes topped with fresh banana slices and a drizzle of syrup. The vibrant colors of the strawberries and blueberries add a nice touch, making the dish not just tasty but also visually appealing. A warm cup of coffee sits nearby, perfect for pairing with these pancakes.
Let’s get into the ingredients and steps to make these delicious banana pancakes!

Banana muffins are a fantastic way to use up those ripe bananas you’ve frozen. They are easy to make and perfect for a quick snack or breakfast. The image shows freshly baked banana muffins, golden brown and fluffy, sitting on a cooling rack. You can see some ingredients like flour, sugar, and milk nearby, hinting at the simple yet delicious process of making these treats.
To make banana muffins, start by gathering your ingredients. You’ll need ripe bananas, flour, sugar, baking soda, eggs, and a bit of butter. The bananas give the muffins a moist texture and natural sweetness. You can also add nuts or chocolate chips for extra flavor.
Once you have everything ready, mash the bananas in a bowl. Mix in the melted butter, sugar, and eggs. Then, combine the dry ingredients in another bowl and gradually add them to the wet mixture. Stir until just combined, and pour the batter into muffin tins.
After baking, the muffins will rise beautifully and fill your kitchen with a delightful aroma. They are perfect warm or at room temperature, making them a great snack to grab on the go.

Banana oatmeal cookies are a fantastic way to use those frozen bananas you have stashed away. They are soft, chewy, and packed with flavor. Plus, they make a great snack or dessert that feels indulgent without the guilt.
The image shows a plate of these delicious cookies, surrounded by oats and banana slices. You can see the texture of the cookies, with oats sprinkled on top, making them look inviting and wholesome. A glass of milk sits nearby, perfect for dipping or washing down these treats.
To make these cookies, you’ll need simple ingredients that you probably already have in your pantry. They’re easy to whip up and can be enjoyed fresh or stored for later.
Enjoy your banana oatmeal cookies with a glass of milk or as a quick snack on the go!
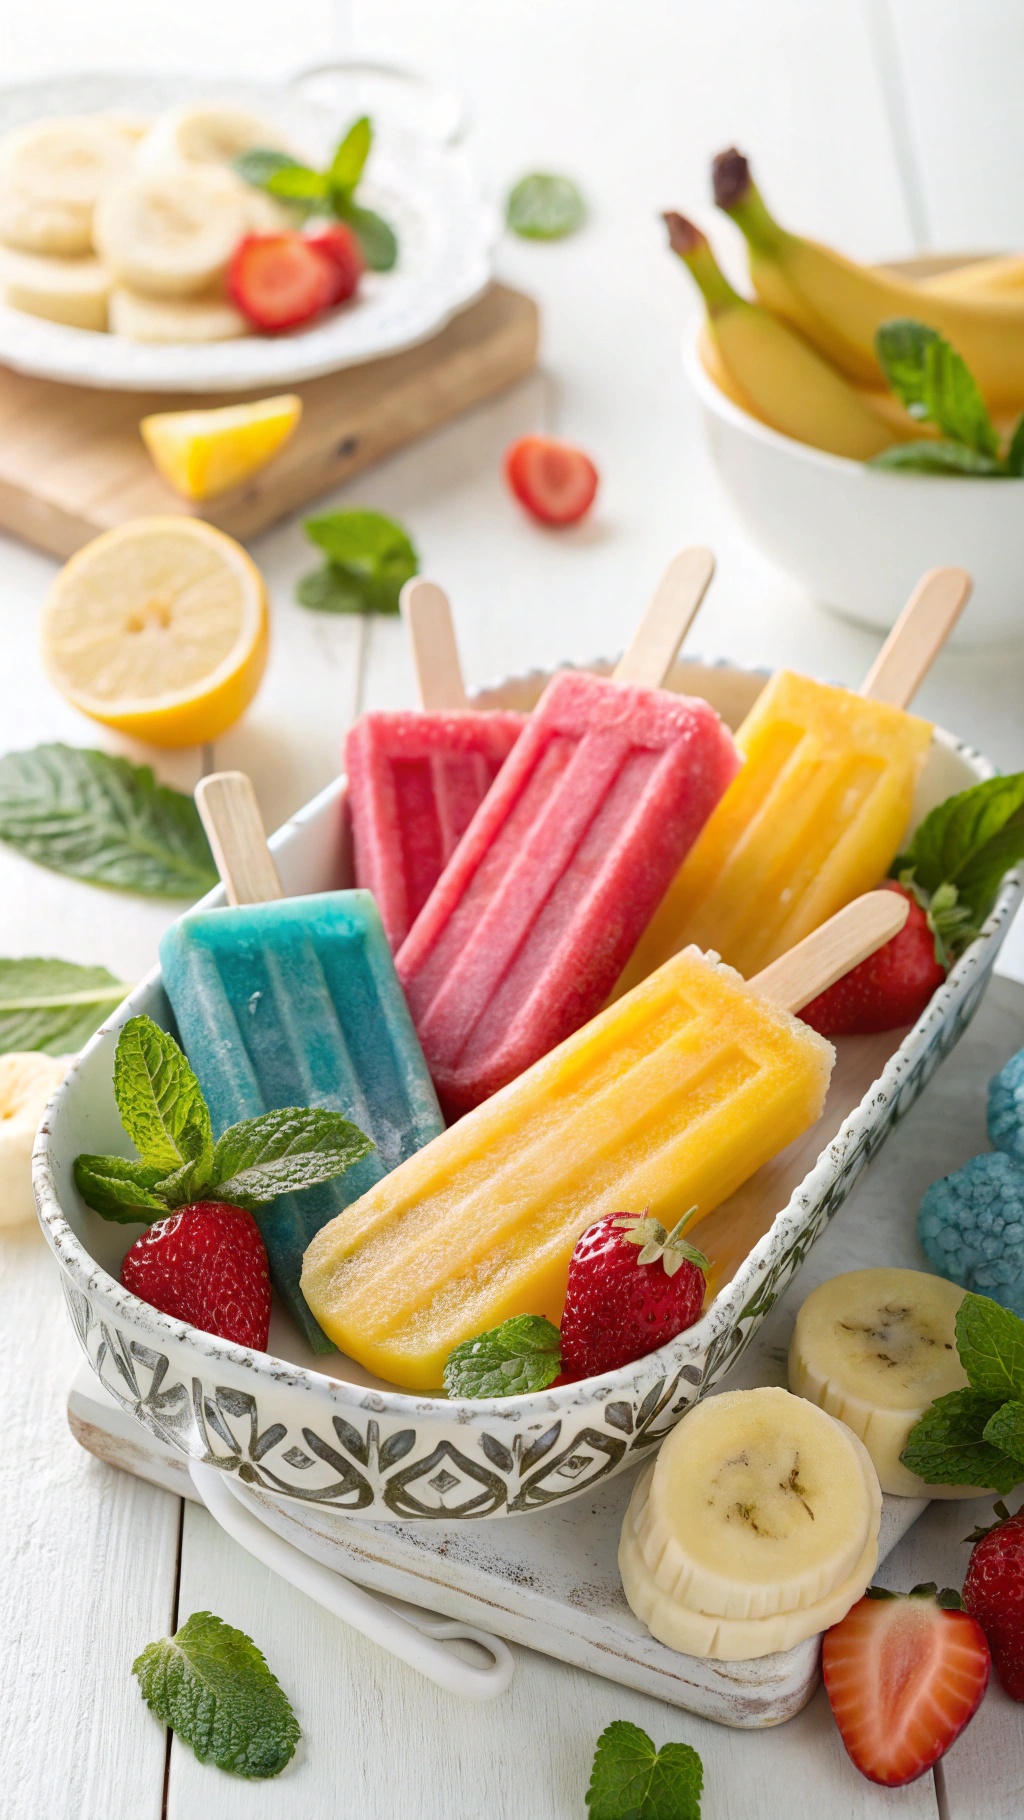
Banana smoothie popsicles are a delightful treat that everyone can enjoy. They are not only refreshing but also packed with nutrients. The image showcases colorful popsicles in a bowl, surrounded by fresh strawberries, mint leaves, and slices of lemon. These popsicles are perfect for hot days and make a fun snack for kids and adults alike.
Making these popsicles is simple and can be a fun activity for the whole family. Just blend your favorite fruits with some yogurt or juice, pour the mixture into molds, and freeze. You can even use those ripe bananas you have in the freezer to create a creamy base.
Here’s how to make your own banana smoothie popsicles:
Enjoy your homemade banana smoothie popsicles as a tasty and healthy snack!
Struggling to Stay on Track with Your Eating?
You’re not alone. One of the biggest obstacles I see people
face is not knowing what to eat. Between busy schedules, endless diet
advice online, and trying to cook healthy meals that actually taste good—it’s
easy to feel stuck or overwhelmed.
That’s why I created my 21 Quick & Easy Custom
Low-Calorie Meal Plans Program. These plans are built specifically for
you—your goals, your lifestyle, and your food preferences. You won’t find
any cookie-cutter diets here. Just real, satisfying meals that help you stay
full, energized, and on track without the stress.
✅ No more guessing.
✅
No more skipping meals or eating “diet food” you hate.
✅
Just a clear, doable plan that fits your life.
👉 Ready to eat better,
feel better, and finally make progress? [Click here to get your custom meal plans today.]
Not Seeing the Inches Drop No Matter What You Do?
If you’re working out but still not seeing the results in
the mirror, I hear you. So many people come to me after months of doing cardio
or random workouts—and still struggling to lose inches or tone up. The truth
is, your body needs more than just movement. It needs a proven strategy.
My 8-Week Workout Program to Lose Inches is designed
to do just that—burn fat, tighten up, and give you visible results.
These workouts are fun, effective, and designed for real people with real
lives. Whether you’re getting back into fitness or ready to take it to the next
level, this program gives you a clear path to success.
✅ Just 8 weeks to build strength,
confidence, and a fitter shape.
✅
No endless cardio.
✅
No gym required (unless you want it).
👉 If you're ready to
drop inches and feel amazing in your own skin, [click here to start the 8-Week Workout Program].
Comments
Post a Comment