10 Irresistible Gluten-Free Desserts You Need to Try


10 Irresistible Gluten-Free Desserts You Need to Try

If you think going gluten-free means giving up on dessert, think again! We've whipped up a list of 10 mouthwatering gluten-free desserts that prove you can still indulge without compromising on taste. From rich chocolate treats to refreshing fruity delights, these recipes are sure to satisfy your sweet tooth while keeping things gluten-free and delicious.

Irresistible Chocolate Lava Cake For Gluten-Free Indulgence

A delicious gluten-free chocolate lava cake topped with fresh raspberries and powdered sugar, oozing chocolate from the center.

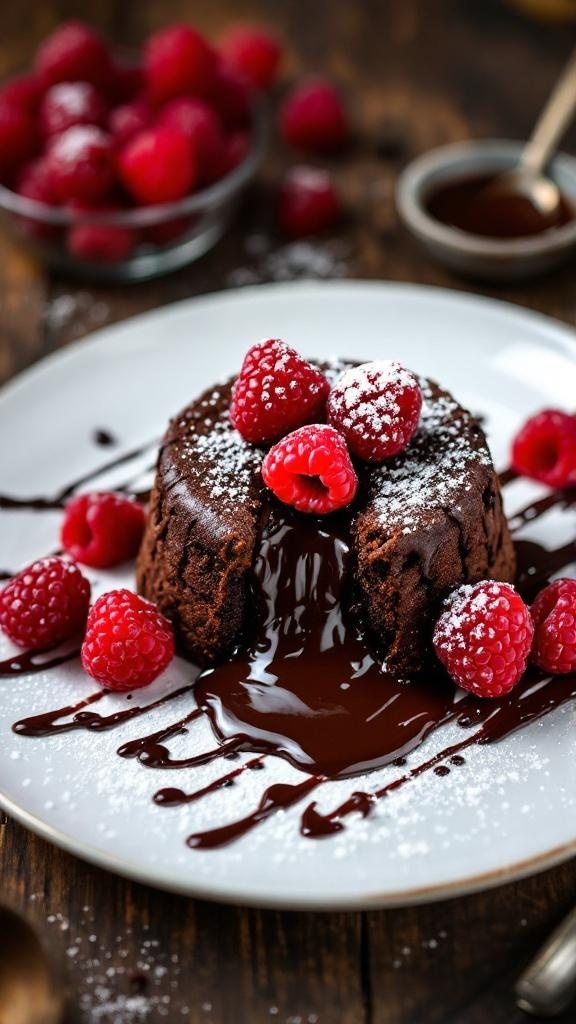
Chocolate lava cake is a dessert that never fails to impress. This gluten-free version is rich and gooey, perfect for satisfying your sweet tooth. The image showcases a beautifully plated lava cake, oozing with warm chocolate at its center. Fresh raspberries and a dusting of powdered sugar add a pop of color and a hint of tartness, balancing the sweetness of the cake.

This dessert is not just a treat for the eyes; it’s also a delight for the taste buds. The combination of rich chocolate and fresh fruit makes it a standout choice for any occasion. Whether you’re hosting a dinner party or simply treating yourself, this lava cake is sure to be a hit.

Making this dessert is easier than you might think. With just a few simple ingredients, you can whip up a batch that will impress your friends and family. Let’s get into the details!

Ingredients

  • 1/2 cup unsalted butter
  • 1 cup dark chocolate, chopped
  • 2 large eggs
  • 2 large egg yolks
  • 1/4 cup granulated sugar
  • 2 tablespoons gluten-free all-purpose flour
  • 1/4 teaspoon salt
  • Powdered sugar, for dusting
  • Fresh raspberries, for garnish

Instructions

  1. Preheat the oven to 425°F (220°C). Grease four ramekins with butter and place them on a baking sheet.
  2. In a microwave-safe bowl, melt the butter and dark chocolate together in 30-second intervals, stirring until smooth.
  3. In another bowl, whisk together the eggs, egg yolks, and granulated sugar until thick and pale.
  4. Slowly add the melted chocolate mixture to the egg mixture, stirring constantly.
  5. Fold in the gluten-free flour and salt until just combined.
  6. Divide the batter evenly among the prepared ramekins.
  7. Bake for 12-14 minutes, until the edges are firm but the center is still soft.
  8. Let the cakes cool for 1 minute, then carefully invert them onto plates.
  9. Dust with powdered sugar and top with fresh raspberries before serving.

Delightful Coconut Macaroons That Melt In Your Mouth

A plate of coconut macaroons drizzled with chocolate, showcasing a delicious gluten-free dessert.

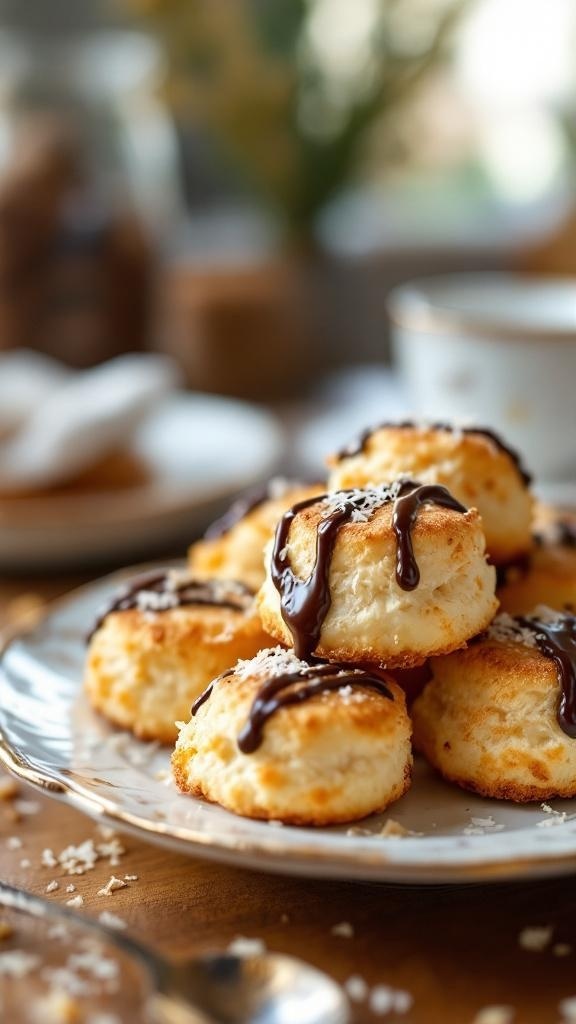
Coconut macaroons are a delightful treat that brings a taste of the tropics right to your kitchen. These little bites are chewy on the inside and crispy on the outside, making them a perfect gluten-free dessert. Topped with a drizzle of rich chocolate, they are sure to impress anyone who tries them.

Making coconut macaroons is simple and requires just a few ingredients. The combination of shredded coconut, sweetened condensed milk, and egg whites creates a sweet and satisfying flavor. You can enjoy them plain or get creative with toppings!

These macaroons are not just tasty; they are also easy to make. Whether you are hosting a gathering or just treating yourself, these cookies are a hit. They can be stored for several days, but they rarely last that long!

Ingredients

  • 2 2/3 cups sweetened shredded coconut
  • 1/2 cup sweetened condensed milk
  • 2 large egg whites
  • 1 teaspoon vanilla extract
  • 1/4 teaspoon salt
  • 1/2 cup semi-sweet chocolate chips (for drizzling)

Instructions

  1. Preheat your oven to 325°F (160°C) and line a baking sheet with parchment paper.
  2. In a large bowl, mix together the shredded coconut, sweetened condensed milk, egg whites, vanilla extract, and salt until well combined.
  3. Using a tablespoon, scoop the mixture onto the prepared baking sheet, spacing them about 1 inch apart.
  4. Bake for 20-25 minutes, or until the tops are golden brown.
  5. While the macaroons are baking, melt the chocolate chips in a microwave-safe bowl, stirring every 30 seconds until smooth.
  6. Once the macaroons are done, let them cool slightly before drizzling the melted chocolate over the top.
  7. Allow the chocolate to set before serving. Enjoy your delicious coconut macaroons!

Fruity Bliss: Easy Gluten-Free Strawberry Shortcake

A tall stack of gluten-free strawberry shortcake with layers of whipped cream and fresh strawberries.

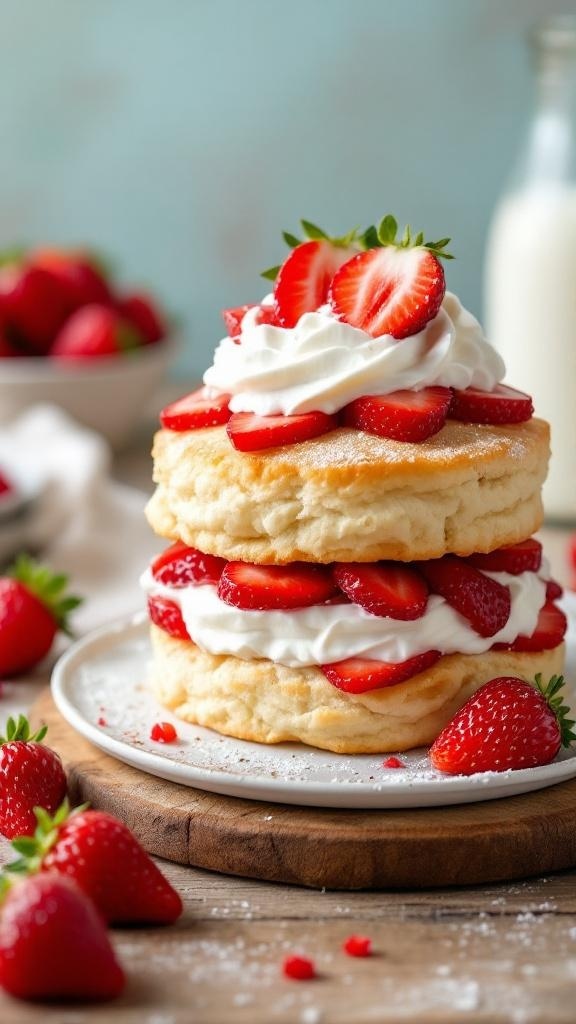
Strawberry shortcake is a classic dessert that brings a smile to everyone’s face. This gluten-free version is just as delightful, featuring layers of fluffy cake, fresh strawberries, and whipped cream. The vibrant red strawberries pop against the soft, golden layers, making it a feast for the eyes as well as the taste buds.

The image showcases a tall stack of gluten-free shortcake, generously layered with whipped cream and strawberries. Each layer is perfectly baked, creating a light and airy texture that pairs beautifully with the juicy fruit. This dessert is perfect for any occasion, whether it's a summer picnic or a cozy family dinner.

Making this dessert is simple and fun. You can enjoy the process of layering the cake and strawberries, and the end result is sure to impress your guests. Plus, it’s a great way to use fresh strawberries in season!

Ingredients

  • 2 cups gluten-free all-purpose flour
  • 1/4 cup granulated sugar
  • 1 tablespoon baking powder
  • 1/2 teaspoon salt
  • 1/2 cup unsalted butter, softened
  • 1 cup milk
  • 1 teaspoon vanilla extract
  • 2 cups fresh strawberries, sliced
  • 1 cup heavy cream
  • 2 tablespoons powdered sugar

Instructions

  1. Preheat the oven to 350°F (175°C). Grease and flour two round cake pans.
  2. In a bowl, mix the gluten-free flour, sugar, baking powder, and salt. Add the softened butter, milk, and vanilla. Beat until smooth.
  3. Divide the batter evenly between the prepared pans. Bake for 25-30 minutes or until a toothpick comes out clean.
  4. Let the cakes cool in the pans for 10 minutes, then transfer to wire racks to cool completely.
  5. While the cakes cool, whip the heavy cream with powdered sugar until soft peaks form.
  6. Once the cakes are cool, slice each cake in half horizontally to create layers.
  7. Layer the cake with whipped cream and strawberries, repeating until all layers are stacked. Top with additional whipped cream and strawberries.
  8. Serve immediately and enjoy your delicious gluten-free strawberry shortcake!

GET 21 QUICK & EASY LOW-CALORIE MEAL PLANS


Classic Flourless Chocolate Cake For Chocolate Lovers

A rich flourless chocolate cake with a glossy ganache topping and mint leaves for garnish.

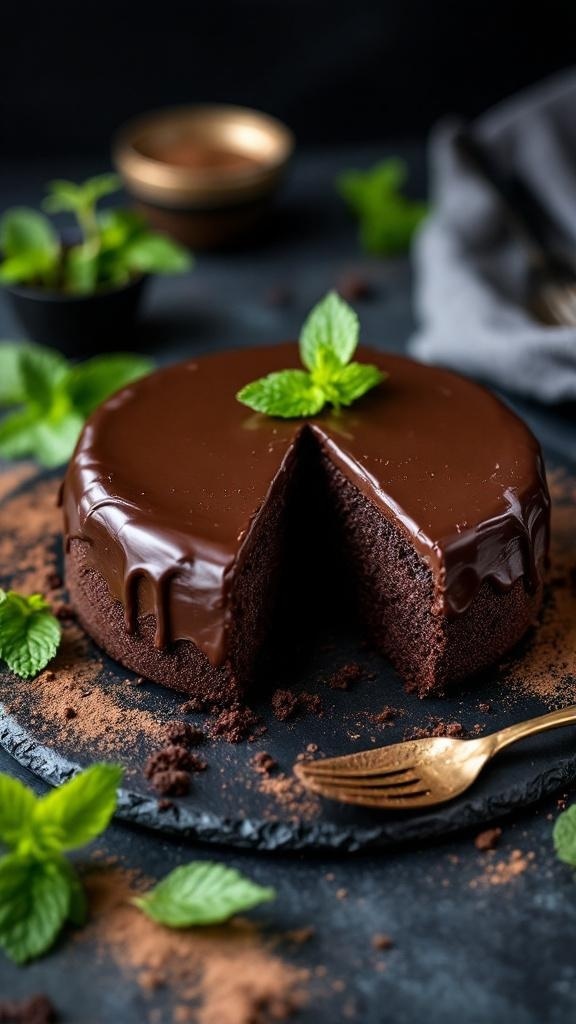
If you’re a chocolate lover, this classic flourless chocolate cake is a dream come true. It’s rich, moist, and incredibly satisfying. The glossy chocolate ganache on top adds a touch of elegance, making it perfect for any occasion. The cake is made without flour, which means it’s naturally gluten-free, allowing everyone to enjoy a slice.

The combination of dark chocolate and butter creates a deep, intense flavor that pairs beautifully with a dollop of whipped cream or fresh berries. The mint leaves scattered around the cake not only add a pop of color but also a refreshing hint that balances the sweetness.

This cake is simple to make and requires just a few ingredients. It’s a great option for gatherings, birthdays, or just a cozy night in. Trust me, once you take a bite, you’ll be hooked!

Ingredients

  • 1 cup unsweetened cocoa powder
  • 1 cup granulated sugar
  • 1/2 cup unsalted butter
  • 1 cup dark chocolate chips
  • 4 large eggs
  • 1 teaspoon vanilla extract
  • 1/4 teaspoon salt
  • Chocolate ganache for topping
  • Fresh mint leaves for garnish

Instructions

  1. Preheat your oven to 350°F (175°C). Grease an 8-inch round cake pan and line the bottom with parchment paper.
  2. In a saucepan over low heat, melt the butter and dark chocolate chips together, stirring until smooth. Remove from heat and let it cool slightly.
  3. In a large bowl, whisk together the cocoa powder, sugar, eggs, vanilla extract, and salt until well combined.
  4. Pour the melted chocolate mixture into the cocoa mixture and stir until fully incorporated.
  5. Pour the batter into the prepared cake pan and smooth the top. Bake for 25-30 minutes, or until a toothpick inserted in the center comes out clean.
  6. Let the cake cool in the pan for 10 minutes, then transfer it to a wire rack to cool completely.
  7. Once cooled, top with chocolate ganache and garnish with fresh mint leaves before serving.

Luscious Lemon Bars With A Gluten-Free Twist

A tray of lemon bars garnished with lemon slices and mint leaves.

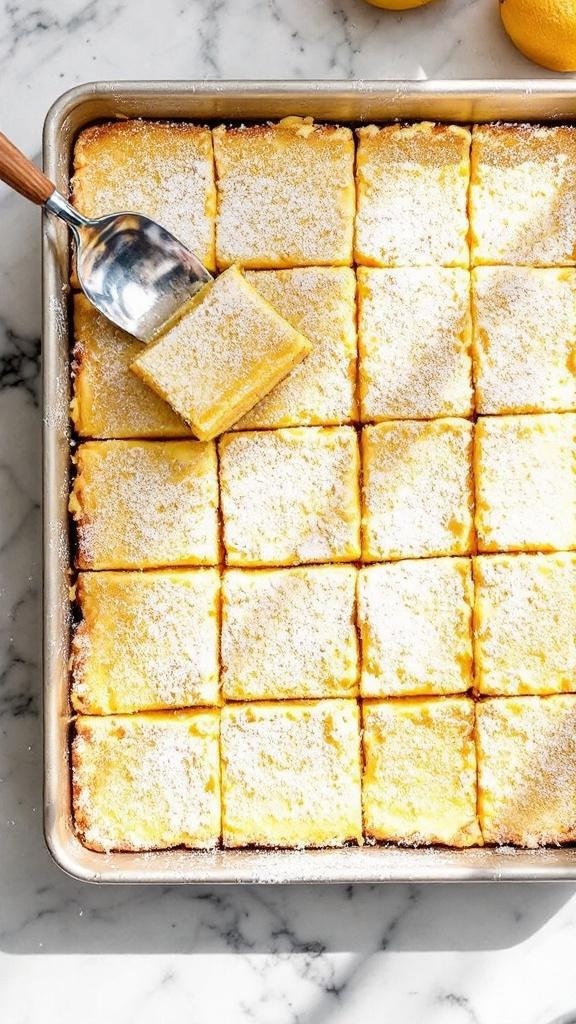
These lemon bars are a delightful treat that brings sunshine to your dessert table. The bright yellow filling is smooth and tangy, perfectly balanced by a sweet crust. The image showcases beautifully cut squares, dusted with powdered sugar and garnished with fresh mint and lemon slices. They look refreshing and inviting, making them hard to resist!

What makes these bars special is their gluten-free twist. Using almond flour or a gluten-free blend allows everyone to enjoy this classic dessert without worry. The combination of zesty lemon and a buttery crust creates a mouthwatering experience that will have your taste buds dancing.

Whether you're hosting a gathering or just treating yourself, these lemon bars are sure to impress. They are easy to make and perfect for any occasion. Let’s get started on this delicious recipe!

Decadent Peanut Butter Cookies That Are Naturally Gluten-Free

A stack of peanut butter cookies with a jar of peanut butter in the background.

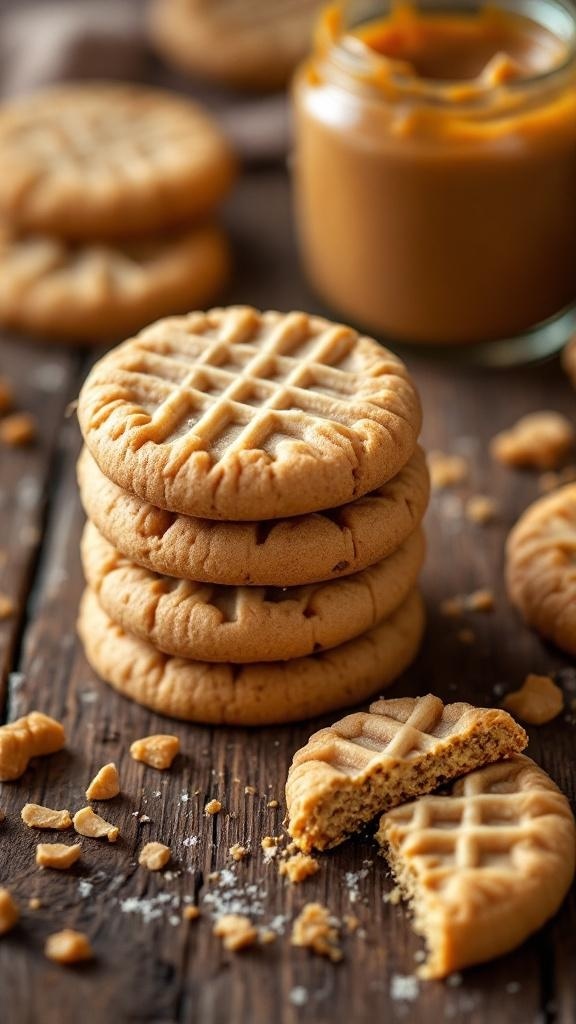
Peanut butter cookies are a classic treat that everyone loves. These cookies are not only delicious but also naturally gluten-free, making them perfect for those with dietary restrictions. The image shows a stack of golden-brown cookies, each with a signature crisscross pattern on top. A jar of creamy peanut butter sits nearby, hinting at the rich flavor that awaits.

These cookies are soft, chewy, and packed with that irresistible peanut butter taste. They are simple to make and require just a few ingredients. Whether you’re enjoying them with a glass of milk or sharing them with friends, these cookies are sure to please.

Ingredients

  • 1 cup creamy peanut butter
  • 1 cup brown sugar
  • 1 large egg
  • 1 teaspoon baking soda
  • 1/4 teaspoon salt

Instructions

  1. Preheat the oven to 350°F (175°C) and line a baking sheet with parchment paper.
  2. In a mixing bowl, combine the peanut butter, brown sugar, egg, baking soda, and salt. Stir until smooth and well combined.
  3. Using a tablespoon, scoop out dough and roll it into balls. Place them on the prepared baking sheet, leaving space between each cookie.
  4. Flatten each ball slightly with a fork, creating a crisscross pattern on top.
  5. Bake for 10-12 minutes until the edges are lightly golden. Let them cool on the baking sheet for a few minutes before transferring to a wire rack.

GET 8-WEEKS OF WORKOUTS TO LOSE INCHES


Exquisite Chocolate-Covered Almonds For A Sweet Crunch

A plate of chocolate-covered almonds with some raw almonds and a bowl of crushed nuts beside it.

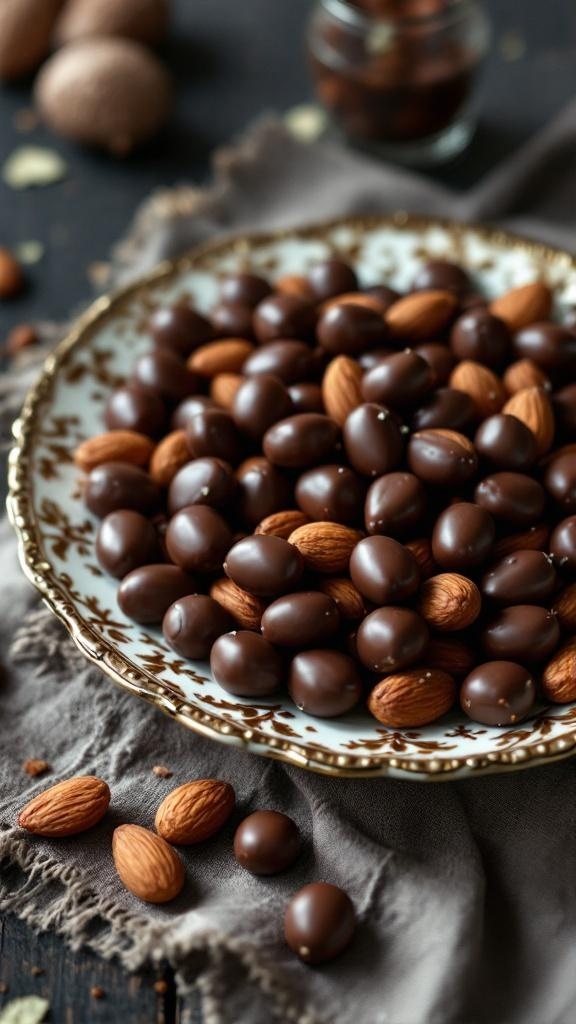
Chocolate-covered almonds are a delightful treat that combines the rich flavor of chocolate with the satisfying crunch of almonds. This combination makes for a perfect snack or dessert. The glossy chocolate coating adds a touch of elegance, making them a great option for gatherings or as a gift.

These treats are not just tasty; they are also gluten-free, making them suitable for those with dietary restrictions. The almonds provide a healthy dose of protein and healthy fats, while the chocolate satisfies your sweet tooth. You can enjoy them on their own or use them as a topping for ice cream or yogurt.

Making chocolate-covered almonds at home is simple and fun. You can customize the chocolate type, whether you prefer dark, milk, or white chocolate. Adding a sprinkle of sea salt or crushed nuts on top can elevate the flavor even more.

Ingredients

  • 1 cup raw almonds
  • 1 cup dark chocolate chips
  • 1 tablespoon coconut oil (optional, for smoothness)
  • Sea salt (optional, for garnish)

Instructions

  1. Prepare the Almonds: Preheat your oven to 350°F (175°C). Spread the raw almonds on a baking sheet and toast them for about 10 minutes until golden and fragrant. Let them cool.
  2. Melt the Chocolate: In a microwave-safe bowl, combine the chocolate chips and coconut oil. Heat in 30-second intervals, stirring in between, until fully melted and smooth.
  3. Coat the Almonds: Dip each almond into the melted chocolate, ensuring it’s fully coated. Use a fork to lift them out, allowing excess chocolate to drip off.
  4. Set and Garnish: Place the chocolate-covered almonds on a parchment-lined baking sheet. If desired, sprinkle a little sea salt on top before the chocolate sets.
  5. Chill: Refrigerate for about 30 minutes until the chocolate hardens. Once set, enjoy your delicious chocolate-covered almonds!

Refreshing Coconut Panna Cotta For A Tropical Escape

A glass of coconut panna cotta topped with mango and toasted coconut flakes.

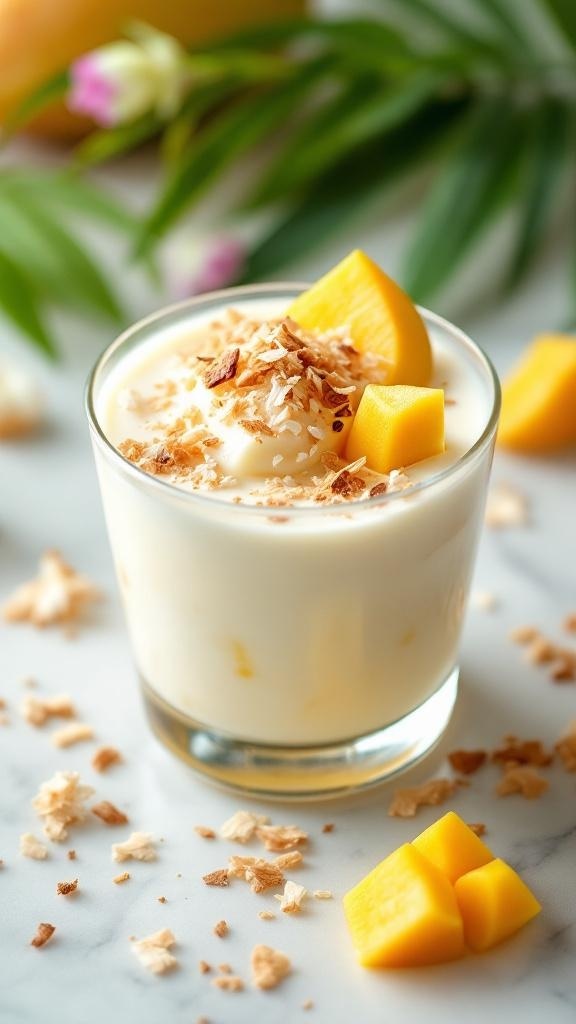
Imagine a creamy dessert that transports you straight to a tropical paradise. This coconut panna cotta is just that! With its smooth texture and delightful coconut flavor, it’s perfect for warm days or any time you crave a taste of the tropics.

The panna cotta is topped with fresh mango chunks and a sprinkle of toasted coconut, adding a burst of color and flavor. The combination of creamy coconut and sweet mango creates a refreshing treat that’s hard to resist.

Making this dessert is simple and requires just a few ingredients. It’s gluten-free, making it a great option for those with dietary restrictions. Serve it at your next gathering, and watch it disappear!

Ingredients

  • 1 cup coconut milk
  • 1 cup heavy cream
  • 1/2 cup granulated sugar
  • 2 teaspoons gelatin powder
  • 1/4 cup cold water
  • 1 teaspoon vanilla extract
  • Fresh mango, diced
  • Toasted coconut flakes for garnish

Instructions

  1. Prepare the Gelatin: In a small bowl, sprinkle the gelatin over cold water and let it sit for about 5 minutes to bloom.
  2. Heat the Mixture: In a saucepan, combine coconut milk, heavy cream, and sugar. Heat over medium heat until the sugar dissolves, but do not boil.
  3. Add Gelatin: Remove the saucepan from heat and stir in the bloomed gelatin until fully dissolved. Add vanilla extract and mix well.
  4. Pour and Chill: Pour the mixture into serving glasses or molds. Refrigerate for at least 4 hours, or until set.
  5. Serve: Once set, top with diced mango and toasted coconut flakes before serving. Enjoy your tropical escape!

Sweet And Spicy Ginger Molasses Cookies To Warm Your Heart

A plate of sweet and spicy ginger molasses cookies, dusted with powdered sugar, surrounded by cinnamon sticks and star anise.

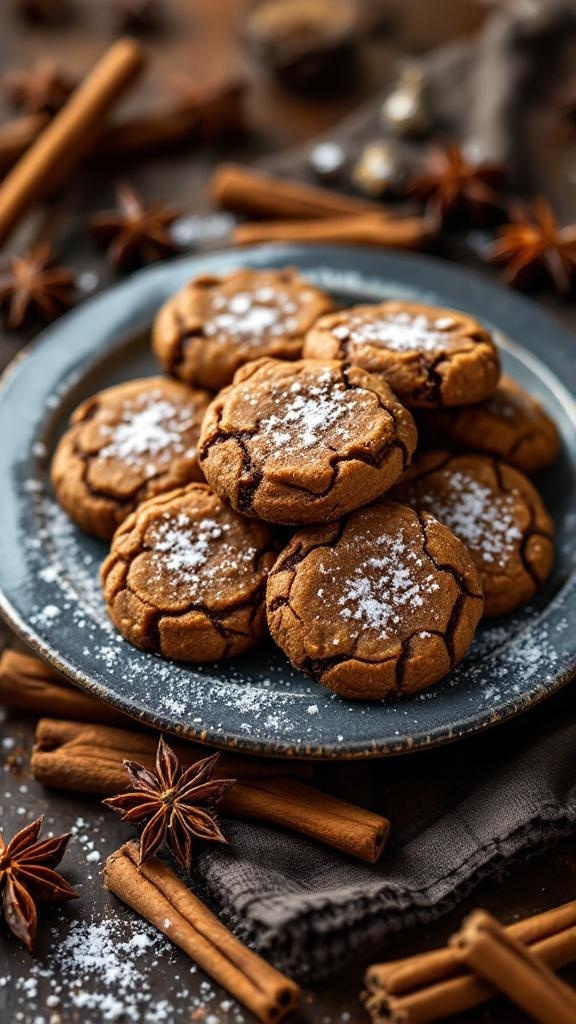
These sweet and spicy ginger molasses cookies are a delightful treat that brings warmth to any occasion. The rich, dark color of the cookies, dusted with a light sprinkle of powdered sugar, makes them look as inviting as they taste. The combination of ginger, cinnamon, and molasses creates a cozy flavor profile that’s perfect for chilly days.

Imagine biting into a soft, chewy cookie that has a slight crunch on the outside. The spices dance on your palate, while the molasses adds a deep sweetness. These cookies are not just gluten-free; they are a comforting classic that everyone can enjoy.

Perfect for sharing with friends or enjoying with a cup of tea, these cookies are sure to become a favorite. They also make a wonderful gift during the holiday season, beautifully packaged in a jar or tin.

Ingredients

  • 2 cups gluten-free all-purpose flour
  • 1 teaspoon baking soda
  • 1 tablespoon ground ginger
  • 1 tablespoon ground cinnamon
  • 1/2 teaspoon ground cloves
  • 1/4 teaspoon salt
  • 1/2 cup unsalted butter, softened
  • 1 cup brown sugar, packed
  • 1/2 cup molasses
  • 1 large egg
  • 1 teaspoon vanilla extract
  • Powdered sugar for dusting

Instructions

  1. Preheat the oven to 350°F (175°C). Line a baking sheet with parchment paper.
  2. In a bowl, whisk together the gluten-free flour, baking soda, ginger, cinnamon, cloves, and salt.
  3. In another bowl, cream the softened butter and brown sugar until light and fluffy. Add the molasses, egg, and vanilla extract, mixing until well combined.
  4. Gradually add the dry ingredients to the wet mixture, stirring until a dough forms.
  5. Roll the dough into small balls and place them on the prepared baking sheet, spacing them about 2 inches apart.
  6. Bake for 10-12 minutes, or until the edges are set. Let them cool on the baking sheet for a few minutes before transferring to a wire rack.
  7. Once cooled, dust with powdered sugar before serving.

Classic Vanilla Ice Cream: A Gluten-Free Delight

A delicious cone of vanilla ice cream topped with chocolate syrup and colorful sprinkles.

Classic vanilla ice cream is a timeless treat that everyone loves. This creamy delight is perfect for warm days or as a sweet ending to any meal. The image shows a beautifully swirled cone topped with colorful sprinkles and a drizzle of chocolate syrup. It’s a simple yet irresistible dessert that brings joy to both kids and adults.

Making gluten-free vanilla ice cream at home is easy and fun. You can enjoy it on its own or pair it with your favorite gluten-free desserts. The rich flavor of vanilla combined with the creamy texture makes it a standout choice.

Here’s how to whip up your own batch of classic vanilla ice cream:

Ingredients

  • 2 cups heavy cream
  • 1 cup whole milk
  • 3/4 cup granulated sugar
  • 1 tablespoon pure vanilla extract
  • 1/2 teaspoon salt

Instructions

  1. In a mixing bowl, whisk together the heavy cream, whole milk, sugar, vanilla extract, and salt until the sugar is fully dissolved.
  2. Pour the mixture into an ice cream maker and churn according to the manufacturer’s instructions, usually about 20-25 minutes.
  3. Once the ice cream reaches a soft-serve consistency, transfer it to an airtight container.
  4. Freeze for at least 4 hours or until firm.
  5. Serve in cones or bowls, topped with your favorite toppings like sprinkles or chocolate syrup.

Struggling to Stay on Track with Your Eating?

You’re not alone. One of the biggest obstacles I see people face is not knowing what to eat. Between busy schedules, endless diet advice online, and trying to cook healthy meals that actually taste good—it’s easy to feel stuck or overwhelmed.

That’s why I created my 21 Quick & Easy Custom Low-Calorie Meal Plans Program. These plans are built specifically for you—your goals, your lifestyle, and your food preferences. You won’t find any cookie-cutter diets here. Just real, satisfying meals that help you stay full, energized, and on track without the stress.

No more guessing.
No more skipping meals or eating diet food you hate.
Just a clear, doable plan that fits your life.

👉 Ready to eat better, feel better, and finally make progress? [Click here to get your custom meal plans today.]


Not Seeing the Inches Drop No Matter What You Do?

If you’re working out but still not seeing the results in the mirror, I hear you. So many people come to me after months of doing cardio or random workouts—and still struggling to lose inches or tone up. The truth is, your body needs more than just movement. It needs a proven strategy.

My 8-Week Workout Program to Lose Inches is designed to do just that—burn fat, tighten up, and give you visible results. These workouts are fun, effective, and designed for real people with real lives. Whether you’re getting back into fitness or ready to take it to the next level, this program gives you a clear path to success.

Just 8 weeks to build strength, confidence, and a fitter shape.
No endless cardio.
No gym required (unless you want it).

👉 If you're ready to drop inches and feel amazing in your own skin, [click here to start the 8-Week Workout Program].


Comments